Adding a YouVisit Interactive Tour
How to add a YouVisit link and image to your page.
Adding a YouVisit Link
To add the normal YouVisit link to your page like the one above, go to the toolbar and choose “Insert” and choose “widget”. Look for the globally shared widget called YouVisit Tour: Main Image and choose insert.
Save and publish your page and you should now see the YouVisit tour on your page.
Adding a Custom YouVisit Link & Image
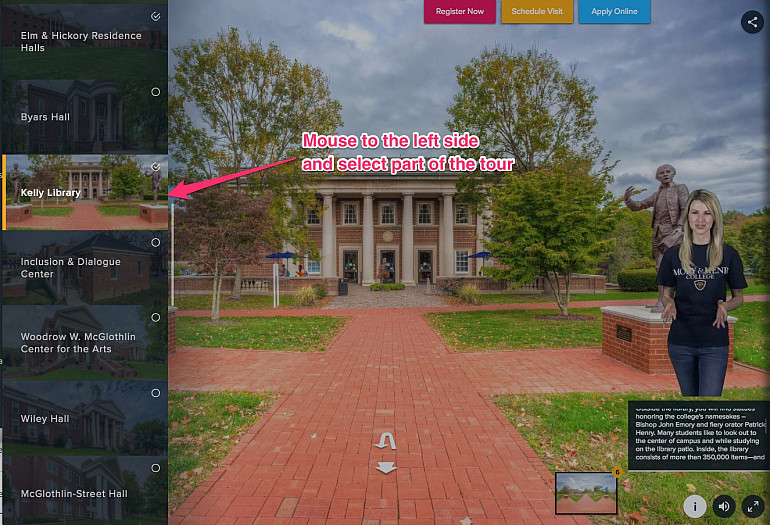
First, go to the main YouVisit tour and decide which part of the tour you’d like to link to:
Open the tour: https://www.youvisit.com/tour/61241/
Mouse to the left side of the screen and choose part of the tour:

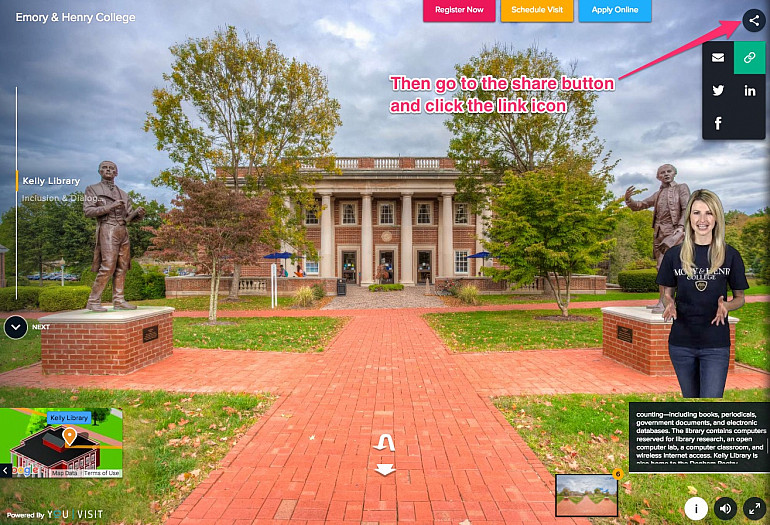
Then go to the share button, click the link icon, and copy the link address:

- Once you copy the link, go to the LiveWhale dashboard (make sure you’re in the right group).
- Go to Libraries: Images > Your Images > Add a new image.
- Upload a new image for the YouVisit Tour. If the tour links to the library, you might upload an image of the library. The image will be displayed at 800 x 445 px.
- In the image caption, write the text to appear on the button. For example “Tour the Library”.
- In the image credit, paste the link you just copied from the YouVisit tour. For this example, the link would go directly to the library tour.
- Tag the image with “youvisit”.
- Save your image.
- Go to the page where you want the tour to appear. Edit Page then use the red insert button in the toolbar to add a widget to your page. Search for the widget:
YouVisit Tour: My Tour Image
Add this widget to your page, save it, and the tour should appear!